Winter Tires Fitted? What to Check Next
Fitting winter tires marks the start of the season, not the end of the job. A few simple checks in the first kilometers determine both the safety and the service life of your tires.
Your winter tires are on, the appointment is closed and the invoice has been issued. So is the job done? In reality, it has only just begun.
Every November follows the same pattern. Drivers and fleet managers treat the switch to winter tires as one of the most important items on the calendar, and once the change is complete, they consider the matter closed. Yet the real performance of a winter tire is shaped by the checks carried out (or skipped) in the weeks immediately after fitting.
A winter tire running at the wrong pressure, with wheel nuts that were never re-checked after the first few kilometers, or with an unnoticed balancing issue, will not deliver the grip it promises, however premium the brand. Worse still, the cost of these small oversights usually comes due at the worst possible moment: the first snowfall or the first patch of black ice.
In this article, we walk through what to check after fitting winter tires, step by step: from re-torquing the wheel nuts within the first 100 km to the break-in period, from why tire pressure drops in cold weather to balancing and tread depth monitoring. At the end, you will find a practical inspection schedule for both individual drivers and fleet managers.
In short: Fitting winter tires is half the job. The other half is a wheel nut check within the first 50–100 km, smooth driving for the first few hundred kilometers, a cold pressure check within the first two weeks and regular tread depth monitoring throughout the season.
Why do the first kilometers matter so much?
A tire looks "ready" the moment it is mounted. In practice, however, both the tire itself and the connection between the wheel and the hub settle in over the first kilometers on the road.
There are three main reasons for this:
Mechanical seating: The contact surface between the wheel and the hub fully seats during the first drives. During this process, the wheel nuts may lose a small amount of clamping torque.
Surface condition: The tread surface of a new tire carries a smooth layer left over from the manufacturing process. Grip does not reach its full potential until this layer wears away and the actual rubber compound is exposed.
Temperature and pressure balance: Winter tires are usually inflated in a warm workshop. Once the vehicle is out in the cold, the air inside contracts and the pressure drops. A pressure that was set correctly at fitting may fall below the required level within a few days.
What these three factors have in common is that they are all invisible. In most cases, drivers do not notice that anything has changed. When they do, it tends to show up as vibration, uneven wear or longer braking distances.
1. Have the wheel nuts re-checked within the first 50–100 km
Re-torquing the wheel nuts after a tire change is the simplest step, yet also the one most often overlooked.
During fitting, the wheel nuts are tightened to the torque specified by the vehicle manufacturer. However, minute gaps between the wheel and the hub close up over the first kilometers. This settling can be more pronounced with alloy wheels, or with wheels that have spent the off-season in storage before being refitted. The result is a loss of torque on the wheel nuts.
For this reason, experts recommend re-checking the wheel nuts with a torque wrench within the first 50–100 km after a tire change. It takes only a few minutes, yet it prevents a serious risk: a wheel working loose.
Points to keep in mind:
The check must always be carried out with a torque wrench. Simply giving the nuts "an extra turn by hand" can lead to overtightening and damage to the wheel studs or the wheel itself.
If you notice a new noise, a clicking sound or a knocking from the wheel area, visit a service point without delay.
If locking wheel nuts are fitted, make sure the key is kept in the vehicle. In the event of a puncture on a winter road, this small part becomes essential.
2. Break-in: give new winter tires time to bed in
If you have purchased new winter tires, they need a short bedding-in period during the first days of use. This is known as the tire break-in period.
The smooth, manufacturing-related layer on the surface of a new tire wears away over the first few hundred kilometers, exposing the true structure of the rubber. This is even more important for winter tires: the fine slits known as sipes, which provide grip on snow and ice, only work to their full potential once the surface has opened up.
General recommendations for the winter tire break-in period:
For the first 300–500 km, avoid harsh acceleration, heavy braking and sharp cornering at high speed.
If you are planning a long journey, try to use the new tires for a few days of urban driving first.
Bear in mind that braking distances may feel slightly different during the first days, and increase your following distance accordingly.
Please note: The break-in period applies to new tires, not to winter tires that are being refitted after a season in tire storage. For a previously used winter set, the priorities are pressure, balancing and tread depth checks.
3. Winter tire pressure: measure it in the cold, not in the workshop
What pressure should winter tires be?
The correct answer is not a single figure but the value specified for your vehicle. You will find it on the driver's door frame, on the inside of the fuel filler flap or in the owner's manual. It may also vary depending on the load (unladen or fully laden).
In winter, however, the real problem is rarely that drivers do not know the right value. It is that they measure it under the wrong conditions.
Why does tire pressure drop in the cold?
The air inside a tire contracts as the temperature falls. As a general rule of thumb, every 10°C drop in ambient temperature reduces tire pressure by approximately 0.1 bar. A tire set to the correct pressure in a 20°C workshop, for example, may fall noticeably below the recommended level on a sub-zero morning.
A winter tire running at low pressure:
Makes wider and uneven contact with the road, causing wear on the shoulders.
Flexes excessively in the sidewall, builds up heat and may suffer internal structural damage.
Increases fuel consumption, as rolling resistance rises.
Evacuates water and slush less effectively on wet and snowy surfaces, raising the risk of losing control.
How to check tire pressure correctly
Take the measurement when the tires are cold, meaning the vehicle has been parked for at least a few hours or has been driven no more than a few kilometers.
Re-check the pressure on a cold morning within the first two weeks after fitting.
Check at least once a month throughout the season, and additionally after any sudden drop in temperature.
Do not forget the spare tire. If you break down on a winter road, an underinflated spare is of little use.
We will cover why tire pressure drops in winter and how to determine the correct pressure in detail in a dedicated article in the coming days.
Pay attention to the TPMS warning light
If your vehicle is equipped with a tire pressure monitoring system (TPMS), make sure the system has been correctly recalibrated after the tire change. A TPMS light that comes on a few days after the change is often simply a sign of colder weather. Even so, the warning should never be ignored, and the pressure should always be measured.
4. Balancing: vibration is a warning sign
Vibration after a tire change is one of the most common complaints among drivers. It is typically felt through the steering wheel or the seat within a specific speed range, usually between 80 and 120 km/h.
The most common cause of this vibration is an imbalance. If the weight of the tire and wheel is not evenly distributed, the wheel produces a slight shudder with every rotation. This affects more than just comfort. It also leads to:
Uneven and premature tire wear,
Accelerated wear on suspension components such as tie rod ends, ball joints and shock absorbers,
Reduced road holding at higher speeds.
When tires are taken out of storage and refitted at the change of season, the balancing weights from the previous season may no longer be valid. That is why balancing at every tire change is not an optional extra but a necessity. At Checklas service points, balancing is a standard step in every tire change, not a separate service.
If the vibration persists even after balancing, the cause may be a bent wheel, a deformed tire or a suspension issue. In that case, the vehicle should be inspected.
Is the vehicle pulling to one side?
If the vehicle drifts to one side when you release the steering wheel on a straight road, this is usually due to wheel alignment or a pressure difference between the left and right sides. Check the tire pressure first; if the problem persists, visit a service point for a wheel alignment and balancing check. On a vehicle with poor alignment, a winter tire can wear as much in one season as it normally would in two.
5. Check the fitting visually: direction, orientation and the four-tire rule
One of the easiest checks after fitting winter tires is simply to look at the markings on the tires themselves.
Direction arrow (Rotation): Many winter tires have a directional tread pattern. The arrow on the sidewall should point in the direction in which the wheel turns when the vehicle moves forward. A directional winter tire fitted the wrong way round suffers a significant loss of performance in water and slush evacuation.
Outer side (Outside / Inside): On tires with an asymmetric tread pattern, the side marked "Outside" must face outwards.
The same tire on all four wheels: Fitting winter tires only to the two wheels on the driven axle creates a serious grip imbalance between the front and rear axles under braking and cornering. For safe driving, it is recommended that winter tires of the same type and similar tread depth are fitted to all four wheels.
Winter tire marking: In addition to the M+S marking, the Three-Peak Mountain Snowflake symbol (3PMSF) on the sidewall indicates that the tire has passed standardized tests for winter conditions.
No expertise is required for this check. A quick walk around the vehicle to inspect the sidewalls of all four tires takes just a few minutes.
6. Know your speed rating and load index
The speed rating of winter tires may be lower than that of the summer tires fitted to the same vehicle. This is accepted under the relevant regulations and manufacturer recommendations; however, the driver needs to be aware of the limit.
The letter at the end of the size code on the sidewall (for example, T = 190 km/h, H = 210 km/h) indicates the maximum speed at which the tire can be safely driven. If the winter tire speed rating is lower than the vehicle's top speed, it is recommended that this information be displayed inside the vehicle where the driver can see it.
For light commercial vehicles, the load index is critical. The load index of a newly fitted winter tire must not be lower than the value stated in the vehicle registration document.
You can look up the speed rating and load index of your tires using our Load and Speed Index tool.
7. Tread depth and tire age: set your baseline at the start of the season
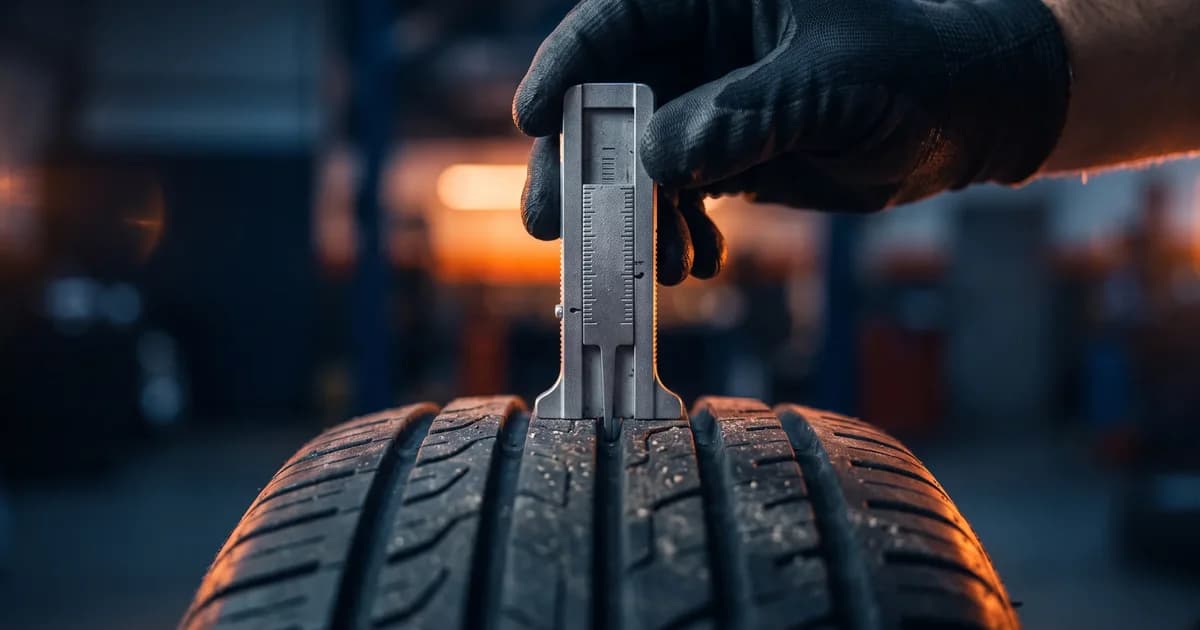
The first weeks of the season are the best time to record the tread depth of your winter tires. This measurement serves as a baseline when deciding at the end of the season whether the tires can be used for another winter.
There are two figures to remember for winter tire tread depth:
1.6 mm: The legal minimum for passenger cars in Turkey.
4 mm: The recommended replacement threshold for winter tires. Below this depth, grip on snow and ice drops significantly.
Measure at a minimum of three points across the tire (inner, center and outer) and take the lowest reading as your reference. You can enter your measurement into our Tread Depth Check tool to see the condition of your tire instantly.
Alongside tread depth, tire age also matters. The last four digits of the DOT code on the sidewall indicate the week and year of manufacture. Rubber hardens over time, even when the tire is not in use. A hardened winter tire cannot deliver the flexibility expected in cold conditions, even if its tread depth appears sufficient. You can find out the age of your tire in seconds with our Tire Age (DOT) Calculator.
8. Adapt your driving habits to winter
Winter tires improve safety in winter conditions, but they do not override the laws of physics. Even the best winter tire cannot achieve the braking distance of a dry road on an icy surface.
Once winter tires are fitted, drivers should pay attention to the following:
Increase your following distance. On wet and snowy surfaces, braking distances can be many times longer than on dry roads.
Avoid sudden maneuvers. Keep steering, acceleration and braking inputs smooth and progressive.
Take extra care on bridges, viaducts and shaded roads. The risk of black ice is higher in these areas than in their surroundings.
Stay alert on sunny winter days, too. Winter tires perform best in the cold; on warm, dry days, braking distances may be slightly longer than with summer tires.
Avoid mounting curbs heavily and driving through potholes. Road surfaces that harden in the cold, together with the road damage that accumulates over winter, can cause sidewall impacts and bent wheels.
Where are your summer tires?
There is one more issue that is often forgotten once winter tires are fitted: the summer tires that came off.
Tires left in the trunk, in the corner of a car park or on a balcony age prematurely under the effects of sunlight, humidity and temperature changes. Improperly stored tires develop cracking and hardening, which can mean an unexpected purchase of new tires when spring arrives.
At the Checklas tire hotel, every removed tire is barcoded and matched to its license plate, with its DOT date, tread depth and overall condition recorded. The tires are stored on barcoded tubular racks in humidity-, temperature- and light-controlled conditions. When spring comes, there is no searching: you know exactly which rack your tires are on and what condition they are in.
For fleet managers: build post-fitting checks into a system
For a single vehicle, the checks above take a matter of minutes. Across a fleet of 50, 100 or 500 vehicles, however, the same checks can easily become tasks that everyone assumes someone else has done, but no one actually has, unless they are tracked.
The most effective approach to fleet winter tire checks is to link them to a schedule and a recording system rather than leaving them to individual drivers' memories.
Recording is half the inspection
With every tire change carried out by Checklas, the tire fitted to each vehicle, its DOT date and its tread depth are recorded by license plate in the ZyTire digital fleet platform at the time of service. This allows fleet managers to see, on a single screen, which vehicles are approaching the tread depth threshold mid-season, and to schedule inspection appointments in bulk.
Depending on the size of your fleet, inspections can be organized in several ways:
Service point network: Tire change and inspection services at more than 250 service points across 81 provinces, all following the same defined workflow.
Mobile service: Instead of vehicles going to a workshop, a fully equipped mobile team comes to wherever the vehicle is parked.
Valet service: Vehicles are collected from their location and returned, fully insured, once the work is complete.
WhatsApp assistant: Drivers can book appointments, check their bookings and access their tire information via our AI-powered WhatsApp assistant at +90 534 799 30 90, with no app to install.
A 60-second winter tire checklist for drivers
Keep this short list in mind before you set off:
No visible damage, bulges or cuts on any of the four tires.
None of the tires looks noticeably flat; the TPMS warning light is off.
The direction arrows point in the forward direction of rotation.
The wheel nuts were re-checked within the first 50–100 km after the change.
The last pressure check was less than a month ago.
The spare tire pressure has been checked.
The locking wheel nut key is in the vehicle.
Frequently asked questions
When should the wheel nuts be re-checked after fitting winter tires?
It is recommended that the wheel nuts be re-checked with a torque wrench within the first 50–100 km after a tire change. The surface between the wheel and the hub settles in over the first kilometers, and the nuts may lose some torque.
How many kilometers should I drive carefully on new winter tires?
For new winter tires, it is advisable to avoid harsh acceleration, heavy braking and sharp cornering at high speed for the first 300–500 km. This allows the tread surface to open up and grip to reach its full potential.
What pressure should winter tires be?
The correct pressure depends on the vehicle and is shown on the driver's door frame, inside the fuel filler flap or in the owner's manual. Always measure when the tires are cold, as every 10°C drop in temperature reduces pressure by approximately 0.1 bar.
Why does the steering wheel vibrate after a tire change?
The most common cause is an imbalance. If vibration continues after balancing, the cause may be a bent wheel, a deformed tire or a suspension issue, and the vehicle should be inspected.
Can winter tires be fitted to just two wheels?
This is not recommended. Fitting winter tires to only two wheels creates a grip imbalance between the front and rear axles, increasing the risk of losing control under braking and cornering. Winter tires of the same type and similar tread depth should be fitted to all four wheels.
What is the minimum tread depth for winter tires?
The legal minimum is 1.6 mm; however, winter tires should be replaced before they fall below 4 mm. Below this depth, grip on snow and ice drops significantly.
Conclusion: winter tires are not an appointment, but a season to manage
Fitting winter tires completes the most visible step of the season; the steps that determine safety and cost come afterwards. A wheel nut check within the first 100 km, pressure checks in the first weeks, balancing and tread depth monitoring all have a direct impact on both driver safety and tire life.
For an individual driver, these checks are a habit that takes a few minutes. For a fleet, they are an operation that requires regular monitoring, recording and planning. Since 2016, Checklas has managed this entire operation, from tire changes and tire hotel storage to mobile service and digital tracking with ZyTire, through a single point of contact and a single invoice.
Your winter tires are on. Now it is time to manage them properly.
👉 To book an inspection, make an appointment or message our WhatsApp assistant at +90 534 799 30 90. 👉 If you would like to build a tire management plan for your fleet for the entire winter season, get in touch with us.
Related articles:
Category:Tire Knowledge